
Workvisa.io Greenhouse Integration Set Up and User Guide
Workvisa.io allows your recruiters to request pre-hire immigration assessments directly from Greenhouse for faster onboarding and a better candidate experience. To set up the integration, you’ll need user permissions in Greenhouse to create custom fields, configure web books, and retrieve API keys.
Step 1: Enable the workvisa.io Stage
Contact your Greenhouse account manager or go to http://www.greenhouse.io/asksupport to request a SendSafely link for your external legal partner to upload an API key, which Greenhouse will use to add workvisa.io to your account. You can then add the stage “Pre-Hire Immigration Assessment” to your interview plan.

Step 2: Configure Custom Candidate Field
From your Greenhouse Dashboard, click the gear icon in the top-right corner and navigate to Custom Options > Company Custom Fields > Candidates. Click the “Add Field” button to create a custom candidate field.
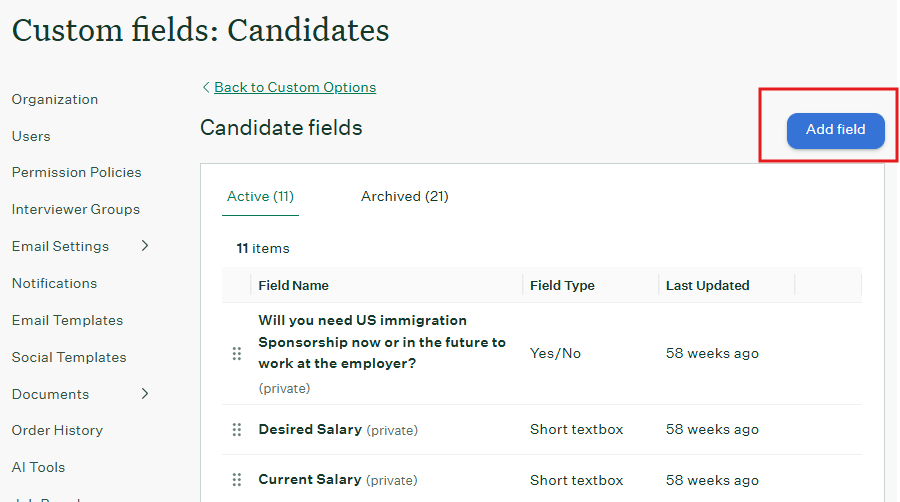
Please enter the information exactly as shown below, including capitalization and spacing for both the Field Name and Type!
PLEASE NOTE: If the Field Name is not entered exactly as shown below, there will be issues with the Web Hook connection!
Field Name: Will you need US immigration sponsorship now or in the future to work at the employer?
Type: Yes/No
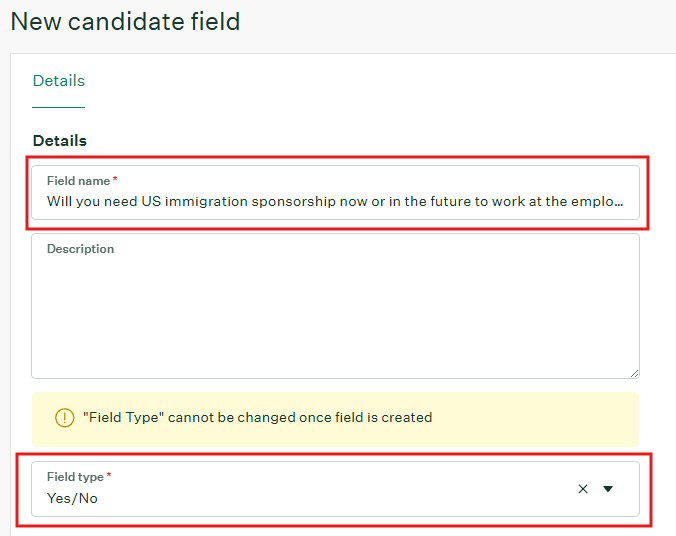
When you click "Save," an email token will be generated automatically. This token is essential for maintaining the webhook connection.
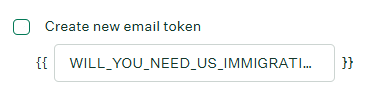
PLEASE NOTE: If you need to change the recommended question, please inform the Agnos integration team of the change, so that the integration team can modify accordingly to avoid issues with the connection. Please provide the new field name as well as the new email token in your email to support@workvisa.io.
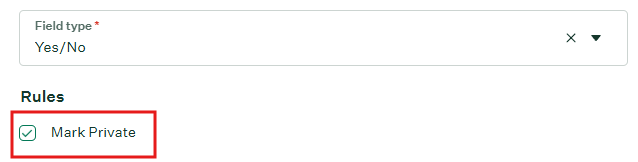
Additionally, you can mark the custom field private, and it does not affect the integration.
Click “Save.” Your newly created field will now be part of the company’s library of candidate fields and be shown under the Details tab of a candidate’s profile.
Step 3: Configure Web Hooks
From your Greenhouse Dashboard, click the gear icon in the top-right corner and navigate to Custom Options > Dev Center > Web Hooks > Web Hooks. Please add the following webhooks highlighted in red below. Click “Create Web Hook” at the bottom of the form after creating the first one to save your changes.

Webhook #1
Name this web hook: workvisa create_candidate
When: Candidate has changed stage
Endpoint URL: https://app.immidee.com/webhook/create_candidate
Secret key: (To be provided)*
Error recipient email: support@workvisa.io
Advanced Settings
Username: (To be provided)*
Password: (To be provided)*
Maximum Attempts: 3
Webhook #2
Name this web hook: workvisa update_candidate
When: Candidate or Prospect updated
Endpoint URL: https://app.immidee.com/webhook/update_candidate
Secret key: (To be provided)*
Error recipient email: support@workvisa.io
Advanced Settings
Username: (To be provided)*
Password: (To be provided)*
Maximum Attempts: 3
Webhook #3
Name this web hook: workvisa application updated
When: Application updated
Endpoint URL: https://app.immidee.com/webhook/update_candidate
Secret key: (To be provided)*
Error recipient email: support@workvisa.io
Advanced Settings
Username: (To be provided)*
Password: (To be provided)*
Maximum Attempts: 3
Web Hook #4
Name this web hook: workvisa candidate unrejected
When: Candidate or Prospect unrejected
Endpoint URL: https://app.immidee.com/webhook/update_candidate
Secret key: (To be provided)*
Error recipient email: support@workvisa.io
Advanced Settings
Username: (To be provided)*
Password: (To be provided)*
Maximum Attempts: 3
Web Hook #5
Name this web hook: workvisa candidate rejected
When: Candidate or Prospect rejected
Endpoint URL: https://app.immidee.com/webhook/update_candidate
Secret key: (To be provided)*
Error recipient email: support@workvisa.io
Advanced Settings
Username: (To be provided)*
Password: (To be provided)*
Maximum Attempts: 3
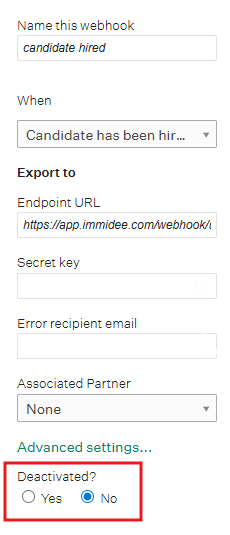
Web Hook #6
Name this web hook: workvisa candidate hired
When: Candidate has been hired
Endpoint URL: https://app.immidee.com/ webhook/update_candidate
Secret key: (To be provided)*
Error recipient email: support@workvisa.io
Advanced Settings
Username: (To be provided)*
Password: (To be provided)*
Maximum Attempts: 3
*These values are unique to your account and will be provided by your external partner.*
Step 4: Retrieve and Send Harvest API Key
From your Greenhouse Dashboard, click the gear icon in the top-right corner and navigate to Custom Options > Dev Center > API Credential Management. Click “Create New API Key”. Select Harvest under “Type“, select workvisa under “Partner“, and Workvisa.io Integration in the description will pre-populate. Then proceed to the next step. Copy the Harvest API Key and share that with the Agnos representative.
On the next screen, select the below permissions from the list. These permissions grant workvisa.io access to fetch the required candidate and job information for the assessment.
Once you’ve saved the permissions, copy the Harvest API key and securely send it to your external partner to complete the integration setup!
Now that you’ve set up the integration, you can now move forward with requesting an assessment for any candidates who indicate they need immigration sponsorship.
| Category | Permission | Fetches |
|---|---|---|
| Applications | GET: Retrieve Application | Application from application ID list |
| Applications | GET: List Applications | List of application IDs |
| Candidates | GET: Retrieve Candidate | Candidate from candidate ID list |
| Candidates | GET: List Candidates | List of candidate IDs |
| Job Posts | GET: List Job Posts | List of job post IDs |
| Job Posts | GET: Retrieve Job Posts for Job | Job posts from job post ID list |
| Job Posts | GET: List Job Posts for Job | Job name and job description |
| Jobs | GET: Retrieve Job | Job name and job description |
| Offers | GET: List Application’s Offers | Offer status history |
| Offers | GET: Retrieve Application’s Current Offer | Current offer status for candidate |
| Offers | GET: Retrieve Offer | Offer ID for candidate |
| Offers | GET: List Offers | List of offer IDs by application ID |
| Offices | GET: Retrieve Office | Job location |
| Offices | GET: List Offices | List of job locations |
| Tags | GET: List Tags Applied to Candidate | Tags for data grouping (e.g. location, offer status) |
| Tags | GET: List Candidate Tags | List of candidate tags |
| Users | GET: Retrieve User | Recruiter name and email |
Once you’ve saved the permissions, copy the Harvest API key and securely send it to your external partner to complete the integration setup!

Now that you’ve set up the integration, you can now move forward with requesting an assessment for any candidates who indicate they need immigration sponsorship.
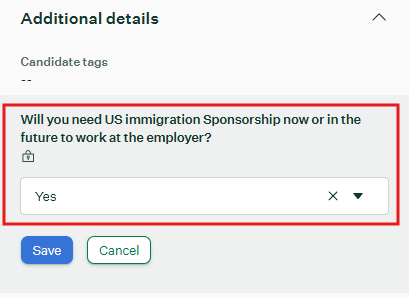
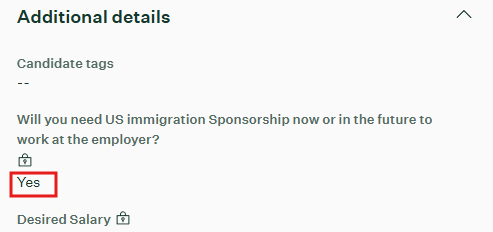
Step 1: Confirm the Candidate Requires Immigration Sponsorship
When the candidate indicates that they now or will in the future require immigration sponsorship, make sure to indicate this under “Details” in their candidate profile by selecting “Yes” to the custom field indicated below.
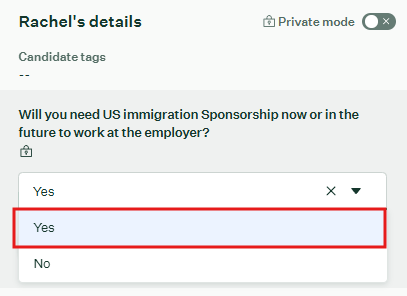
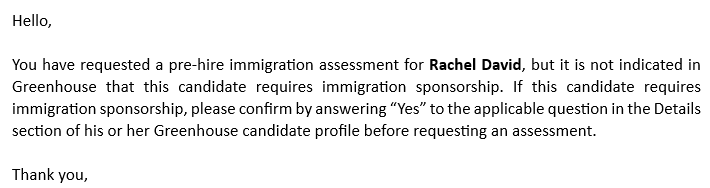
Important Note: If you select “No” or leave the custom field indicated above blank, you will receive an error message and email notification indicating that you will not be able to send the Pre-Hire Immigration Questionnaire to the candidate.

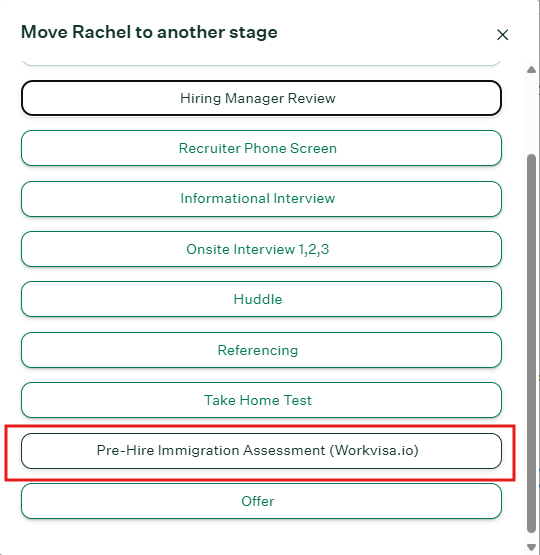
Step 2: Initiate the Immigration Assessment Request
When you are ready to request an immigration assessment, move the candidate to the Pre-Hire Immigration Assessment stage. Once the candidate is moved to the Pre-Hire Immigration Assessment stage, click “Send Test” to send our questionnaire to the candidate.
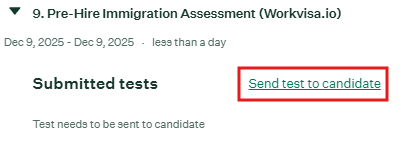
The questionnaire will be emailed to the candidate, copying a primary contact and the assigned recruiter in Greenhouse.
Step 3: Receive the Immigration Assessment
The assessment will be issued based on the completed questionnaire, the candidate’s resume/CV, and the details of the offered position harvested from Greenhouse. The recruiter will then receive an email with the assessment.
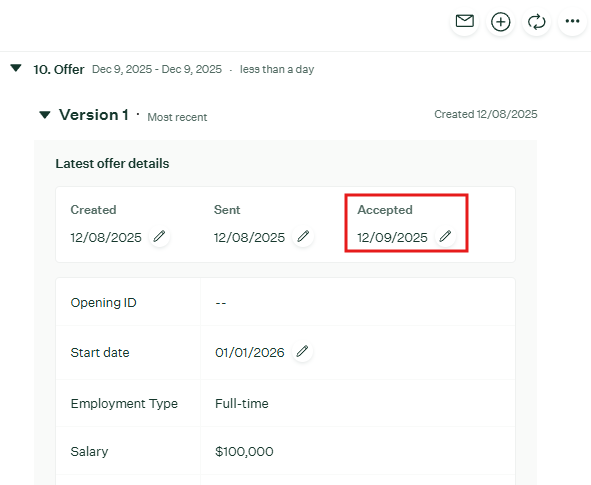
Step 4: Confirm Offer has been Accepted and Sent
If an offer is placed and accepted, make sure to update the candidate profile on Greenhouse to confirm the acceptance date and upload the signed offer letter. The integration will notify the law firm that the offer has been accepted and will pass along the signed offer letter to the database. The case workers will be notified and will therefore initiate a case for the newly onboarded employee.
Troubleshooting Errors After Implementation
If you are experiencing errors sending pre-hire immigration questionnaires to the candidate, please ensure the webhooks are enabled, and the proper steps below are being followed.
Under webhook configurations, edit each webhook and ensure that they are configured properly and enabled
2. Before sending the questionnaire, these steps were taken:
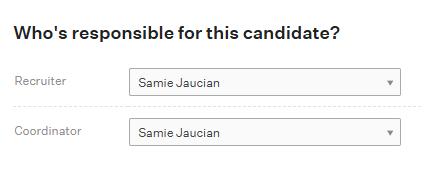
A recruiter was assigned to the candidate
The candidate was marked “Yes” for requiring immigration sponsorship
The candidate was moved to the workvisa.io stage prior to sending the pre-hire immigration questionnaire
